Easter is on its way and we are so unprepared! I plopped 3 Easter eggs on the mantle and that's the extent of our holiday decor.
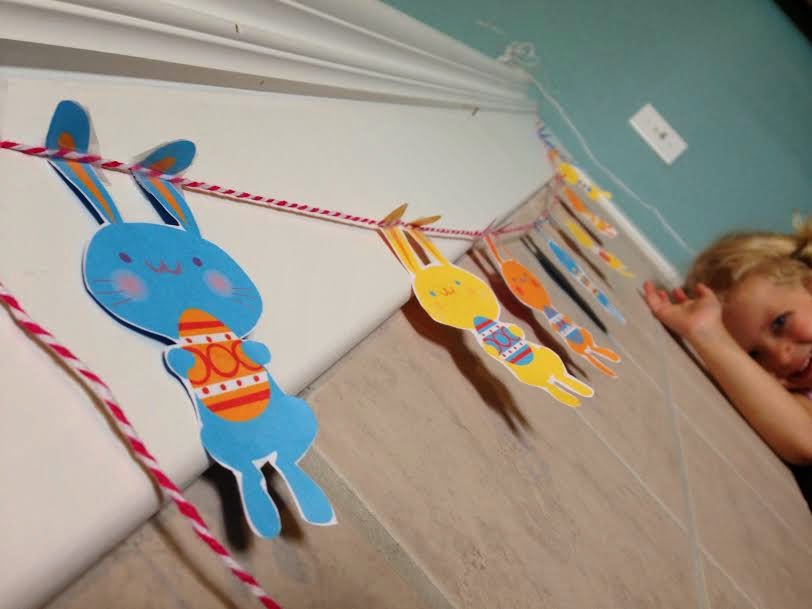
Thanks to happythought for our festive addition!
This garland is ADORABLE. And EASY. And FREE.
Follow this link over to happythought to input your email to print off your own!
Showing posts with label Pinteresting. Show all posts
Thursday, April 10, 2014
Tuesday, April 8, 2014
Toilet Paper Roll Bunnies
We made these a few years ago with a toddler friend of ours using two toilet paper rolls and scrapbook paper (oh, and the ever essential googly eyes).
At the time they were both 2 so I did the cutting and most of the glue work but they enjoyed decorating them and it kept their attention for a solid 10 minutes so that's a win!
![]() |
| I thought they turned out pretty gosh darn cute.
Recycling doesn't get much cuter.
|
Sunday, April 6, 2014
Marbled Milk Paper
It's springtime so, naturally, we're a little obsessed with rainbows and color.
I've also been desperately trying to find easy crafts that I already have the supplies for to keep my 4 year old busy.
In comes Marbled Milk Painting to save the day!
Step 1: Cut your watercolor paper to a size that easily fits in your dish/tray. (Keep the trimmed paper nearby, you'll want to work quickly once the colors are swirled!)
Step 2: Pour roughly 3 - 5 tablespoons of milk into the dish. (Enough milk that a thin layer covers the bottom of the dish.)
Step 3: Add drops of different colors of food dye in the milk around the dish.
Step 4: Add drops of dish soap around the food coloring. The dish soap will start interacting with the colors!
I've also been desperately trying to find easy crafts that I already have the supplies for to keep my 4 year old busy.
In comes Marbled Milk Painting to save the day!
Thank you to babble dabble do for the idea!
Materials needed:
Milk (I use almond milk)
Dish soap
Q Tips or Toothpicks
Food coloring
Watercolor paper (Unfortunately, we did not have watercolor paper so I used regular ol' computer paper which didn't turn out quite as pretty)
Tray/Shallow dish
Step 1: Cut your watercolor paper to a size that easily fits in your dish/tray. (Keep the trimmed paper nearby, you'll want to work quickly once the colors are swirled!)
Step 2: Pour roughly 3 - 5 tablespoons of milk into the dish. (Enough milk that a thin layer covers the bottom of the dish.)
Step 3: Add drops of different colors of food dye in the milk around the dish.
Step 4: Add drops of dish soap around the food coloring. The dish soap will start interacting with the colors!
Step 5: Use a Q Tip or toothpick to start swirling the colors.
Step 6: Before the colors get too mixed together (like above...) dip one of the sheets of paper into the colors. Press gently. Lift and set aside to dry. Repeat!
![]() |
| We're going to do this again with watercolor paper - it will definitely turn out even more pretty! |
Monday, February 10, 2014
DIY Glow Stick Arrow Valentine - Free Printable!
I'm most definitely not anti sugar but my goodness do kids get overloaded with it. It's Valentine's day and Bella's treat jar still has Halloween candy in it.
And I can't be the only one.
So here's how we made our class Valentine's minus the diabetes and hopefully they're just as enjoyable!
First, we bought a few packages of 7 small glow bracelets from the dollar store. Then I put some clip art on a page that I could print and cut out. Once we cut out the arrows we snipped the paper right below the point of the arrow and inserted the glow stick through the incision and secured it with tape. I added a cutesy little pun, she signed her name and ta-da - a Valentine!
If you'd like, feel free to print out my template. Or create your own!
And I can't be the only one.
So here's how we made our class Valentine's minus the diabetes and hopefully they're just as enjoyable!
First, we bought a few packages of 7 small glow bracelets from the dollar store. Then I put some clip art on a page that I could print and cut out. Once we cut out the arrows we snipped the paper right below the point of the arrow and inserted the glow stick through the incision and secured it with tape. I added a cutesy little pun, she signed her name and ta-da - a Valentine!
If you'd like, feel free to print out my template. Or create your own!
![]() |
| Just save and print! |
Happy Valentine's Day!
Tuesday, November 19, 2013
DIY Chalkboard Tree Topper
During Christmas of 2012 my tree topper broke and I was actually somewhat thankful that I had a legitimate reason to throw it out (it had been through one too many Christmases and one too many out of city moves). I threw it out knowing I'd be hitting up the after Christmas sales for a new one.
Until Christmas 2013 came around and I realized I was so miserably pregnant last Christmas that I wasn't going anywhere unless it was to get a baby out of my blimp body.
So this year I was tree topless and my tree looked sad (and skanky. I mean, put a top on, seriously.)
And then I remembered I had little chalkboard painted signs I had made for a photo prop and if it had been a terribly produced movie, Christmas choruses would have began sounding.
Lo and behold. I did something and thought, "...I should pin that." So I did. Yay, Christmas!
NOTE: If you want yours to look similar to how I made mine, I simply bought a wooden plaque from Hobby Lobby for $1.47, used wood glue and glued it to two wooden skewers (because it's what I had in the kitchen though you really can attach it to anything sturdy. A stick from outside will do.) and then painted it with chalkboard paint.
My husband would be so proud of the money we saved by my forgetting to buy a tree topper the year before!
Until Christmas 2013 came around and I realized I was so miserably pregnant last Christmas that I wasn't going anywhere unless it was to get a baby out of my blimp body.
So this year I was tree topless and my tree looked sad (and skanky. I mean, put a top on, seriously.)
And then I remembered I had little chalkboard painted signs I had made for a photo prop and if it had been a terribly produced movie, Christmas choruses would have began sounding.
![]() |
| Let's pretend a child wrote that and not an adult with poor penmanship. It's cuter that way. |
Lo and behold. I did something and thought, "...I should pin that." So I did. Yay, Christmas!
NOTE: If you want yours to look similar to how I made mine, I simply bought a wooden plaque from Hobby Lobby for $1.47, used wood glue and glued it to two wooden skewers (because it's what I had in the kitchen though you really can attach it to anything sturdy. A stick from outside will do.) and then painted it with chalkboard paint.
My husband would be so proud of the money we saved by my forgetting to buy a tree topper the year before!
Wednesday, November 6, 2013
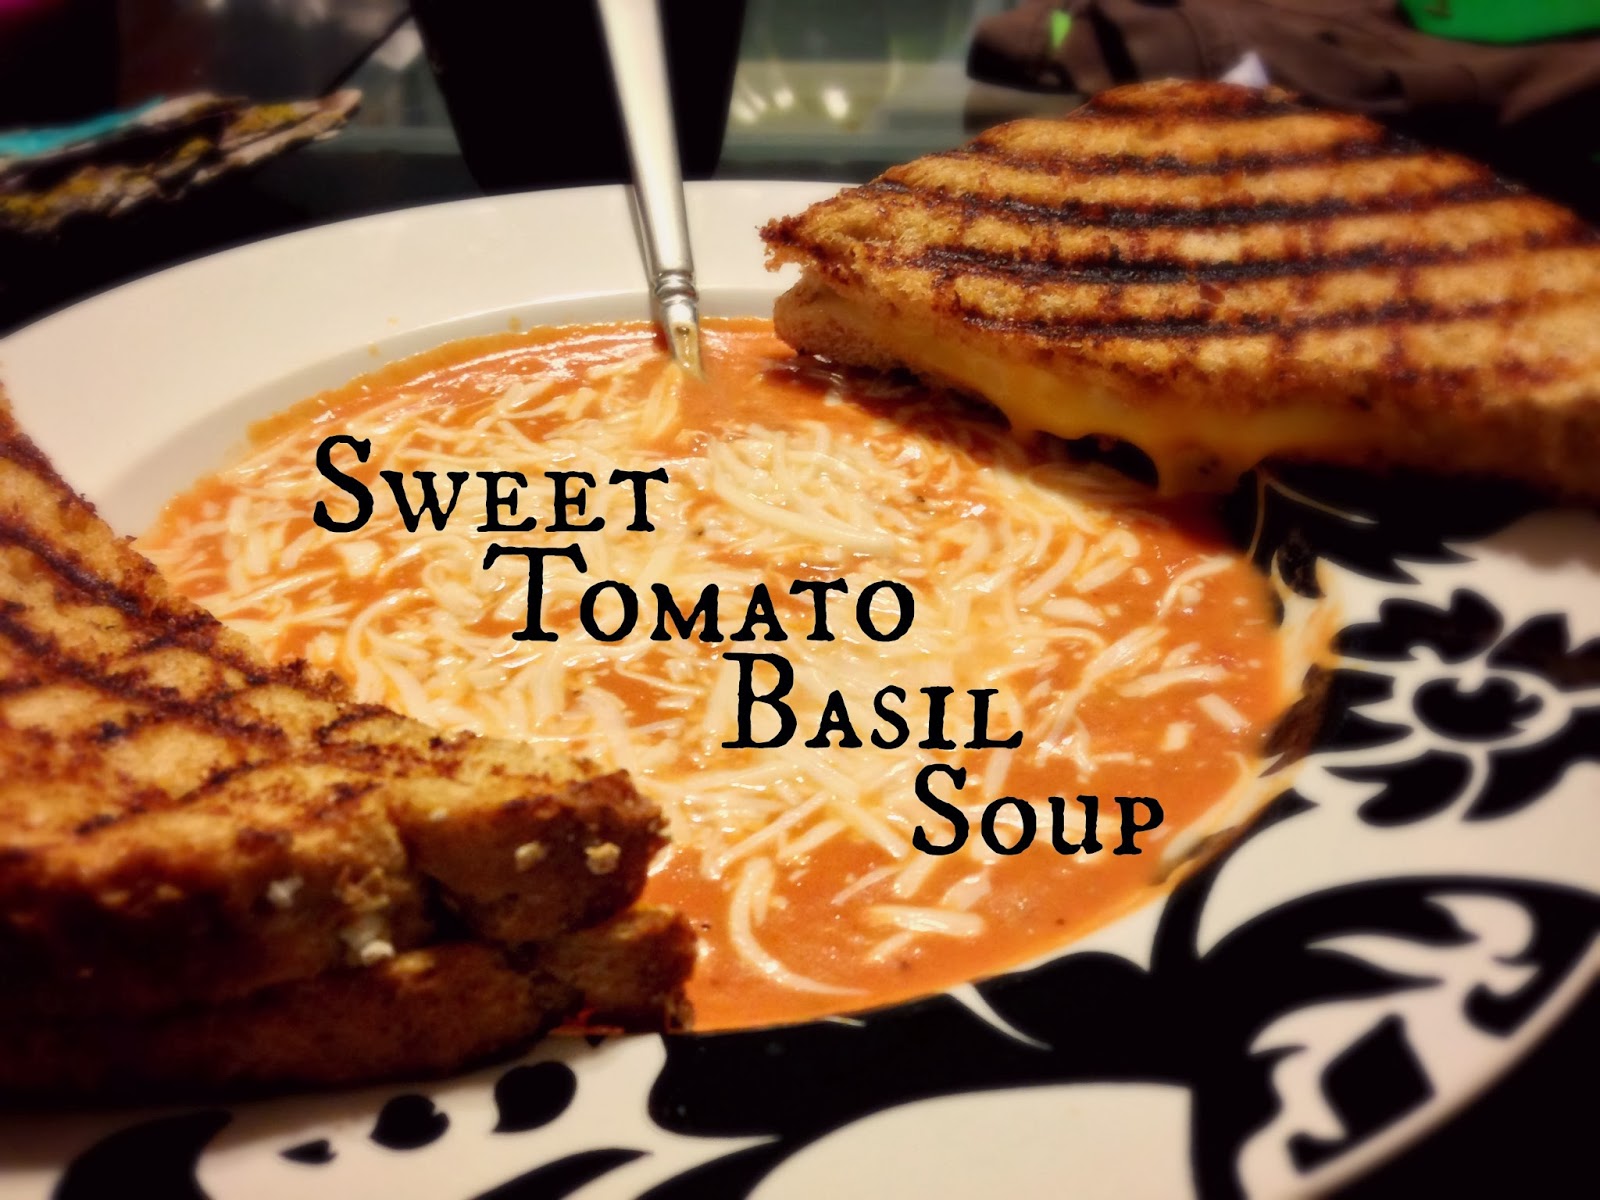
Sweet Tomato Basil Soup
I am not a big soup person. Neither is my husband. Or my kids, really. (So what am I doing posting a soup recipe...) But it's fall! And we have to make soup! And we're going to do our best to like it, dangit!
So, on some crazy autumn whim, I decided to try this tomato soup recipe out and holy crap. I loved it. It's rich, it has substance, it has a fantastic tomato taste without it being too tiring or overwhelming, if that makes sense. (After a few bites of Campbell's tomato soup, I'm always thinking, 'Yeah...kind of tired of the tomatoes...')
Anyway. I seriously recommend you try this. PLUS, it was easy enough to make that my daughter could help me. (In case you're wondering what the rest of my family thought, my husband and oldest daughter thought it was fine and my 10 month old loved it. In my opinion, that's a very good outcome for a family of non soup enthusiasts.)
So, on some crazy autumn whim, I decided to try this tomato soup recipe out and holy crap. I loved it. It's rich, it has substance, it has a fantastic tomato taste without it being too tiring or overwhelming, if that makes sense. (After a few bites of Campbell's tomato soup, I'm always thinking, 'Yeah...kind of tired of the tomatoes...')
Anyway. I seriously recommend you try this. PLUS, it was easy enough to make that my daughter could help me. (In case you're wondering what the rest of my family thought, my husband and oldest daughter thought it was fine and my 10 month old loved it. In my opinion, that's a very good outcome for a family of non soup enthusiasts.)
Sweet Tomato Basil Soup
| Original recipe from 365 Days of Slow Cooking. |
1 medium onion, diced
3 Tbsp olive oil
1/3 cup all purpose flour
1 Tbsp dried basil (or about 1/4 cup fresh)
1 tsp oregano
1 Tbsp caramelized tomato paste*
2 (28 oz) cans crushed tomatoes
4 cups chicken broth (or 4 cups water + 4 tsp chicken buillon granules)
1 Tbsp honey
1 tsp salt
1 cup heavy cream, warmed
1/4 cup finely chopped fresh Italian parsley (I actually didn't add this because I didn't have it but I so wish I had!)
Salt and pepper to taste
Grated mozzarella or Parmesan cheese
*You really want to caramelize the tomato paste. The recipe promised a flavor boost and they weren't lyin'. Heat 1 Tbsp of olive oil in a skillet, add 1 (6 oz) can of tomato paste and cook until it reaches a deep crimson color.
(I realize now after typing this out that I did the wrong thing and added ALL of the caramelized tomato paste to the slow cooker instead of the 1 Tbsp it called for. But it was delicious...so if it was wrong, maybe I don't want to be right.)
If you don't want to follow my example, add 1 Tbsp of the caramelized tomato paste to the slow cooker and freeze the rest in 1 Tbsp increments.
1. Add diced onion, olive oil, flour, basil and oregano to a microwave-safe bowl. Stir until blended. Microwave for about 5 minutes. (Stir about every 90 seconds). Transfer to slow cooker.
2. Add in tomato paste*, crushed tomatoes, broth, honey and salt.
3. Stir and cover. Cook on low for 5-7 hours or on high for 3-4 hours.
4. Remove lid and turn to HIGH. Stir in warmed cream and Italian parsley. Salt and pepper to taste. Let cook for another 10 minutes without the lid.
5. Ladle into bowls and top with cheese. Serve with warm bread or rolls (or grilled cheese, if you need the extra comfort food).
The original recipe noted they served it with frozen ravioli for the kids which I definitely plan to try next time.
Thursday, May 23, 2013
Homemade Crunchwrap Supreme
I used to love Taco Bell. When I wanted "Mexican" food, that meant I wanted Taco Bell. I know, it's laughable. And I've really only ever ordered two things. First it was always a Grilled Stuft Burrito. Now it's a Crunchwrap Supreme. (I say "now" loosely because I don't remember the last time I went to a Taco Bell. Wait, I just remembered. It was a few months ago. Before that though, it was a long time. Probably, like, another few months.)
That being said, I was super intrigued by this "homemade" version. I kept my expectations low and was, I'm so sorry pardon my pun, Supremely surprised! (I'm really sorry about that.)
The instructions get really confusing to me, so I attempted a picture tutorial to accompany the instructions.
That being said, I was super intrigued by this "homemade" version. I kept my expectations low and was, I'm so sorry pardon my pun, Supremely surprised! (I'm really sorry about that.)
The instructions get really confusing to me, so I attempted a picture tutorial to accompany the instructions.
![]() |
| Recipe and picture from Mary Quite Contrary Bakes |
Homemade Crunchwrap Supreme
12 "burrito size" flour tortillas
6 corn tortillas
1 lb ground beef
1 pkg taco seasoning of your choice
1 jar of taco cheese (found in the same aisle as the Mexican foods/or chips)
(I have NO idea what that means but I couldn't find it and used a jar of Salsa Con Queso instead)
1 container of sour cream
3-4 tomatoes (depending on size)
1 bag/head of iceberg lettuce
**Please note these quantities and measurements for filling crunch wraps are estimates. You should adjust filling amounts to suit your own taste.
Preheat oven to 400 degrees F. Use one corn tortilla to cut a circle of the same size out of 6 of the flour tortillas. Put the 6 cut out flour tortillas aside. (Reserve outside of the 6 flour tortillas for making homemade tortilla chips if desired.)
Sidenote: I didn't do that. I cheated and used a smaller size of packaged flour tortillas. I had to trim some of the medium tortillas so the larger tortilla could wrap around it but I found this to be easier for me than tracing and cutting tortillas.
Place 6 corn tortillas on a baking sheet and bake until crispy (I would recommend starting with 5 minutes and then checking every 2-3 minutes until they are done to your liking). Put oven to "warm".
Cook the ground beef with the taco seasoning as directed on packet and set aside (I actually used homemade taco seasoning I got from here).
Chop tomatoes and lettuce.
Have a medium size skillet ready on the stove and have a counter surface with all of your ingredients ready to assemble.
Microwave a full size flour tortilla for about 10 seconds (or until warm) and lay onto counter surface.
Place some ground beef in the center of the tortilla
and top with some of the cheese.
Lay a corn tortilla on top and press down slightly.
Top corn tortilla with some sour cream (I did about 1-2 TBSP)
and some chopped lettuce and tomato.
Top entire thing with one of the cut out flour tortillas that are the same size as the corn tortilla.
Fold each side of the larger tortilla up until all the filling is covered, pressing down to somewhat seal it.
![]() |
| First attempted crunchwrap |
![]() |
| Second attempt - perfection |
Spray the cooking pan lightly with cooking spray and place the crunch wrap into it, seam side down.
Cook on low-medium, pushing down lightly with a spatula, for 2-3 minutes on each side.
Place on serving pan in oven to keep warm until ready to eat. Continue with other ingredients until you have made all the crunch wraps.
Enjoy! Bella did!
Chicken Alfredo Rollups
One of my favorite things to make and bring to people who need meals are these Lasagna Rollups I found in Taste of Home. (I'll post that recipe another time when I can include a picture). So I recently saw this recipe for Chicken Alfredo Rollups, which are really similar and probably packed with more creamy and glorious calories. And who in their right mind says no to that?
This ended up being a little more time consuming than I anticipated but it was totally worth it. So was making the homemade Alfredo sauce. Do that.
![]() |
| Recipe from Mmm...Cafe |
Chicken Alfredo Rollups
9 lasagna noodles
2 ½ cups alfredo sauce (optional homemade recipe below) (I highly recommend it)
2 cups cooked, shredded chicken (I used rotisserie)
oregano
garlic salt
3 cups shredded Mozzarella, or cheese of your choice
Spray an 8×8 pan with non-stick spray and pour ½ cup alfredo sauce, or just enough to cover the bottom of the pan. Boil 8-10 cups water in a large pan, cook lasagna noodles until al dente. Now this is the important part! Drain and rinse the noodles with cold water to prevent them from sticking to each other. Then, lay out each noodle individually and blot dry with a paper towel. (I didn't blot them dry but I made sure they weren't soaking wet. I think it's to keep it dry enough to roll but not so dry that they stick. It's a little tricky.) Spread about 2 Tbs. alfredo sauce over each noodle. (If there is too much sauce you will have a big mess on your hands!) Sprinkle oregano and garlic salt on top of sauce. Take 1/9 of the shredded chicken and spread it out evenly over each noodle. Add approx. 3 Tbs. cheese. To roll up, start at one end and roll the noodle over the toppings. You will need to lift the noodle a little to prevent squishing out the inside ingredients while rolling.Place the roll-ups in the pan, one by one, seam-side down so they don’t come undone. Once they are all in the pan, pour the remaining alfredo sauce over the top. Top with remaining cheese. Bake at 350 degrees for about 30 minutes, or until the cheese is completely melted on top.
The Best Garlic Alfredo Sauce
½ cup butter
2 ounces cream cheese
2 cups heavy cream (or substitute half and half)
2 teaspoon garlic powder
½ tsp. fresh minced garlic
salt and freshly ground black pepper
½ tsp dried oregano
⅔ cup parmesan cheese
In a medium to large saucepan melt the butter over medium heat. Add fresh minced garlic and cook for 1 minute, or until fragrant. Add the cream cheese and whisk to smooth and melted. Whisk in the heavy cream.Season with the garlic powder, salt and pepper. Bring to a simmer and whisk frequently until sauce thickens, around 15 minutes. Stir in the cheese and when melted, remove from heat and serve.
Tuesday, April 23, 2013
Fruit Salad with Honey Lime Dressing
I made this for a group of 20 people and there was still fruit left over. It's one of my favorite healthier snacks for get togethers now.
Add to that the fact that this was put together last minute in about 15 minutes. Hallelujah.
![]() |
| Recipe and picture originally from Oh! You Cook! |
Fruit Salad with Honey-Lime Dressing
1 pt. container strawberries
1 pt. container blueberries
(I actually used about 1 1/2 bags of frozen blueberries because I'm cheap.)
1 bunch (about 1 1/2 lbs.) seedless grapes (green, red or a mixture of both)
1/4 cup honey
juice from 2 limes (about 2-3 tablespoons)
Rinse strawberries, blueberries and grapes.
Gently pat dry the fruit. Hull strawberries, then cut each in half; if large, cut into quarters.
Remove stems from blueberries, if any.
Remove grapes from stems.
Gently combine all three in a large bowl or aluminum tray. Set aside.
In a small bowl, whisk together honey and lime juice. Pour over fruit.
Ta da. Ea - sy.
Tequila Lime Chicken
This is one I will definitely attempt again because I know the potential for this is amazing but I am the worst at cooking anything that's not beef on a stovetop. My chicken always ends up raw or dry. And if I'm cooking a breaded chicken, forget it.
That being said, this chicken came out dry and tasting like half of the flavor had cooked out. What flavor was there was wonderful though! The sweetness of the tequila and the sour smell and tang of the lime was refreshing - and perfect for the warm evening we ate it with.
If you try this, I hope it turns out perfect for you!
That being said, this chicken came out dry and tasting like half of the flavor had cooked out. What flavor was there was wonderful though! The sweetness of the tequila and the sour smell and tang of the lime was refreshing - and perfect for the warm evening we ate it with.
If you try this, I hope it turns out perfect for you!
Tequila Lime Chicken
![]() |
| Recipe originally from Plain Chicken |
3 whole Limes, Juiced
5 cloves Garlic, Peeled
1 whole Jalapeno, Sliced
5 cloves Garlic, Peeled
1 whole Jalapeno, Sliced
(I ommitted the Jalapenos because I don't like them...)
1 teaspoon Kosher Salt
½ cups Cilantro
½ cups Tequila
5 Tablespoons Olive Oil
4 whole Boneless, Skinless Chicken Breasts
1 cup Monterey Jack Cheese, Grated
Combine lime juice, garlic cloves, sliced jalapeno, salt, cilantro, and tequila in a food processor or blender. Pulse until combined. Turn on the blender/food processor and drizzle in the olive oil until it’s all combined.
Slightly flatten chicken breasts with a mallet or the bottom of a heavy skillet. Place in a plastic bag and pour in marinade. Seal bag and marinate for several hours or (preferably) overnight.
When ready to cook, remove chicken from bag and place on the grill. Cook until completely done. Toward the end of cooking, top chicken breasts with grated Monterey Jack and allow to melt. (You can also top chicken with cheese and melt under the broiler.)
1 teaspoon Kosher Salt
½ cups Cilantro
½ cups Tequila
5 Tablespoons Olive Oil
4 whole Boneless, Skinless Chicken Breasts
1 cup Monterey Jack Cheese, Grated
Combine lime juice, garlic cloves, sliced jalapeno, salt, cilantro, and tequila in a food processor or blender. Pulse until combined. Turn on the blender/food processor and drizzle in the olive oil until it’s all combined.
Slightly flatten chicken breasts with a mallet or the bottom of a heavy skillet. Place in a plastic bag and pour in marinade. Seal bag and marinate for several hours or (preferably) overnight.
When ready to cook, remove chicken from bag and place on the grill. Cook until completely done. Toward the end of cooking, top chicken breasts with grated Monterey Jack and allow to melt. (You can also top chicken with cheese and melt under the broiler.)
Wednesday, April 10, 2013
Cleaning Your Microfiber Couch/Now I Don't Have To Buy A New Couch
Whenever we have people over I normally apologize for one of three different things (sometimes all three).
"Sorry the house is so messy."
"Sorry the carpets are gross." and
"Sorry the couch looks disgusting. I promise those stains are just milk, water or yogurt thanks to my toddler." They don't look like milk stains. They look like the stains you see on motel furniture right before you bolt out asking for a new room or peeling out of the parking lot screaming. (I've never actually done that part but I have reacted that way in my heart.)
So when I stumbled upon a Pin that claimed to clean my couch to display furniture quality, I immediately pinned it, without reading it, and wrote the ingredients I needed onto my grocery list.
I really wish I had thought to take ONE before picture but I didn't think about it. I honestly was expecting it not to work. And at one point I very angrily ranted to Palmer about how I wasted my time with this stupid attempt. But once the couch dried it actually did look better than it had in quite a while.
So, if you have a microfiber couch, I would recommend you try it and see what you think. I haven't had to apologize for my couch in a few months so that says something!
What you need:
![]() |
| Note: not my pictures. Who am I kidding, I don't plan ahead that well. |
*Update* Lo and behold, I found a bottle of rubbing alcohol at Dillon's that had a spray bottle attachment. Glory be, they must have seen this post and concluded brilliance.
Make sure you get a WHITE sponge and WHITE bristle brush so that there is no accidental color transfer onto the couch when you are scrubbing.
| Here's a picture, just for fun. |
Make sure you get a WHITE sponge and WHITE bristle brush so that there is no accidental color transfer onto the couch when you are scrubbing.
(I used a light brown sponge because that's what we had on hand and it matched to color of our sofa; so you could go that route as well. )
Pour the rubbing alcohol in the spray bottle and SATURATE the stained area.
I know this seems counter intuitive but rubbing alcohol evaporates much faster than water so it won't leave a water mark.
Take your sponge and start scrubbing the area. Don't be afraid to use all your muscles and scrub hard.
You'll start to see the dirt coming off onto your sponge.
If your sponge get's really dirty before you are finished, switch it out for a new one to avoid rubbing old dirt onto clean areas.
Let the areas you sprayed dry. They will look darker than the rest of your couch and will feel kind of hard to the touch, but don't worry about it.
That's what the bristle brush is for.
Once the couch is COMPLETELY dry, take your bristle brush and with swirling motions, refluff the areas you cleaned.
| The result. This mom of the year was supposed to be making dinner when I did this so I didn't think to smooth out the lines in the microfiber. |
Something I didn't do that I would definitely recommend doing was using the white bristle brush to "fluff" or soften the microfiber again. I didn't do it and the cushions had the texture of cardboard for several days.
I got the tutorial from 551 East and she has a helpful FAQ at the end of her page.
Blueberry Cake Mix Muffins
All I have to say is Pinterest Win.
| Recipe originally from Six Sisters' Stuff |
Cake Mix Blueberry Muffins Recipe:
Ingredients:
1 box yellow cake mix
1 teaspoon baking powder
2 tablespoons all-purpose flour
2/3 cup milk
1/3 cup vegetable oil
3 large eggs
1-2 cups fresh blueberries
Directions:
Preheat oven to 375 degrees. Mix dry cake mix (don't follow directions on the box), baking powder, flour, milk, oil, and eggs together thoroughly. Fold in the blueberries (reserving a few to sprinkle on top) very gently, only stirring a couple of times so that your batter doesn't turn blue/purple. Pour into lined muffin cups, filling about 2/3 full, and bake for 15-20 minutes. Makes 16-18 muffins.
Crock-Pot Cheesy Chicken & Broccoli Over Rice
Soooo this was a Pinterest attempt with mixed reviews.
I expected for me to like this, my toddler to eat a little of it (if she was in a good mood) and my husband to not like it (sorry, Palms).
Plot twist:
I didn't care for it...at all. My husband really liked it and my daughter ate everything but the rice.
So, instead of slapping the "Pinterest fail" label on it and deleting it from my "Food" board, I'll post it here and move on.
I expected for me to like this, my toddler to eat a little of it (if she was in a good mood) and my husband to not like it (sorry, Palms).
Plot twist:
I didn't care for it...at all. My husband really liked it and my daughter ate everything but the rice.
So, instead of slapping the "Pinterest fail" label on it and deleting it from my "Food" board, I'll post it here and move on.
| Recipe originally from Clipping Money |
Creamy Crock-pot Chicken and Broccoli Over Rice
3-4 boneless chicken breasts
1 10oz can cream of chicken soup
1 10 oz can cheddar soup
1 14 oz can chicken broth
½ teaspoon salt
¼ teaspoon garlic salt seasoning
1 cup sour cream
6 cups broccoli florets, just fork tender
1 cup shredded cheddar cheese
1. Place soups, chicken broth, salt, and garlic seasoning into a crock-pot over low heat. Whisk until smooth. Place chicken in, pressing to the bottom. Cover lid and cook on low for 6 hours or on high for 3 hours.
2. When chicken is cooked, use 2 forks to shred into bite size pieces. Stir in sour cream and broccoli.
3. Serve over steamed rice and sprinkle with cheese. 4-6 servings
Tuesday, March 26, 2013
Easter Egg Caterpillar
HOLY CUSS WHERE DID ALL OF THESE EASTER EGGS COME FROM WHY ARE THEY HERE AND WHAT DO THEY HAVE TO DO WITH JESUS BECOMING A HOLY GHOST ZOMBIE?!
I mean, it's Easter time! And I have so many left over plastic eggs from last year's egg hunts and this year's community egg hunt and the eggs I foolishly bought thinking I may not have enough, I just may go crazy.
There are really cute and creative ways to reuse these eggs (like making popcicles in them, hiding games in them and serving surprise snacks/meals inside) but I haven't found any that actually get rid of them, I mean...permanently re-purpose them.
Enter Google, the Easter Caterpillar:
The idea originally came from Child Central Station but I had to make a few tweaks to make it work for the eggs we have.
First you need:
- pipe cleaners
- plastic eggs with at least one hole on each end
- googly eyes
First you want to string the pipe cleaner through one whole egg, top and bottom shell, to create the tail.
| No, that is not Easter sperm, that is the demonstrated tail of the caterpillar. |
What worked best for me was to use an egg with two holes in the bottom shell to create the tail. I thread the pipe cleaner through the inside of the egg, through the bottom, back in through the second hole and then twisted it on the inside of the egg until it was mostly secure.
(I should have taken pictures...the website did a much better job explaining all of this. I'm just adding the adjustments I had to make.)
Then you only use one half of each egg shell to create the rest of the caterpillar.
I found, however, that not all of the eggs had a hole in them and the ones that did were too small for the pipe cleaner. So I used a knife to round out the holes to make them large enough for the pipe cleaner to string through. The website directed you to use two pipe cleaners for the entire caterpillar but most of my eggs only had one hole and I'm too lazy to go all cavewoman and carve holes into all of these eggs.
So, then it was Bella's turn.
She strung on the egg shells, practicing her fine motor skills, and actually really enjoyed herself. We named the colors and discussed our favorites; hers being pink and purple but she also likes white.
When we got to the last egg shell we strung it through and because I only used one pipe cleaner I was stumped as to how to give the caterpillar 2 antennae like the website did. I tried to convince her it was a tongue but that wasn't going to work for her.
So I found another egg shell that had two holes, cut another piece of pipe cleaner to string through and create a second antennae.
| Like that. |
We glued googly eyes, hence her name, and Ta Da! Bella's new "pet" was created. (Google is friends with a snake also and likes to hang out in the bathroom).
I would recommend gluing the head onto the body to fasten it more securely in place. This morning Google had one eye and a half severed head (rough night in the bathroom).
If you try this, I hope you enjoy it as much as we did. :) It took more improvising than I anticipated but it was worth it. Like I said, she was quickly given a gender, a name, declared a new pet, resides in the bathroom (odd...) and even has a specific noise it makes. She's a great new toy and I'm down several plastic eggs - totally worth it.
Sunday, March 24, 2013
Make Ahead/Freezable Breakfast Burritos
I'm in desperate need of really quick and on the go breakfasts that aren't over processed, sugary dyed food products. I tried out these breakfast burritos 2 weeks ago which yielded almost 20 burritos that I'm still reheating today. I'm a big fan.
| Recipe and picture originally from Are We There Yet? |
Breakfast Burritos
Ingredients:
1 lb. Pork Sausage
1 Pkg. Hash browns
8 to 12 Large eggs
1/4 cup milk
1 pkg. shredded cheese
salt and pepper
1 to 2 pkg. flour tortillas
Brown sausage - drain on a paper towel.
Cook hash browns in the same pan. (Definitely use a non-stick pan...)
While the hash browns are cooking whisk eggs, milk, salt and pepper in a large mixing bowl.
Add browned sausage back to the pan with the cooked hash browns.
Add the eggs to the sausage mixture and cook until the eggs are done, stirring gently.
After eggs are done lay a tortilla on counter. Place egg mixture on tortilla. Top with cheese. Roll into a burrito.
Depending on how many eggs you use and how large you make each burrito, will determine how many burritos you will end up with.
To freeze:
Wrap the burritos in plastic wrap.
Then place the wrapped burritos in freezer zip-lock bags.
Place in freezer.
The blogger who originally posted this recipe gave specific heating instructions that don't work well for me or my microwave (I'm not sure where to place blame, haha) I end up warming the burrito up for a minute, cutting it in half and warming it up for another minute.
Here are the instructions the originally post gave:
"When you are ready to eat - take the number of burritos you want out of the freezer (we usually only do two at a time) - unwrap (yes, I am making a big deal about this - if you have wrapped the burritos in plastic wrap you MUST unwrap them!) - place in a paper towel and warm ONE of the burritos for 45 seconds - take out - warm the second ONE for 45 seconds. Then put the first one back in the microwave for another 30 seconds. Repeat for second burrito.
I know this method of warming sounds strange, but we have found to be able to heat the burrito all the way through, this is the best way."
Serve with salsa, sour cream, or plain. Your choice.
Subscribe to:
Posts (Atom)